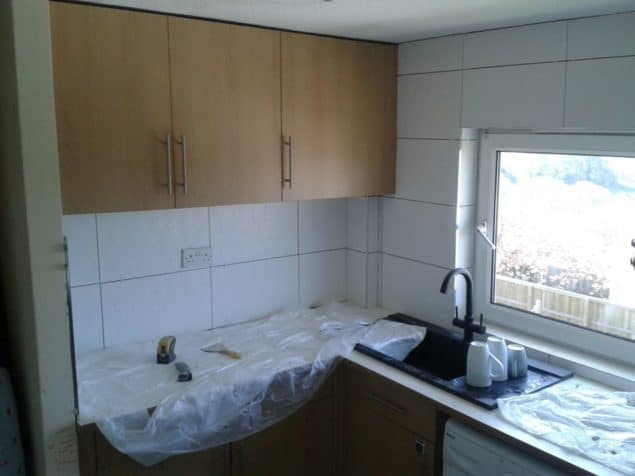
I cannot tell you how happy it makes me to write this post. This kitchen makeover has been in progress for a year…aha, you read that right…a year!! Why, you might ask. Well, it’s a long story.
We started last April by replacing the hob, sink and worktop and we removed all the kitchen tiles. Then we had an issue with the worktop so couldn’t go ahead with tiling. It took forever to sort the worktop issue and then, as always, life got in the way. We’d got used to living with no tiles and time passed.
Realising it had been a year gave me the kick up the bum I needed to get going again. So while we were in Poland on holiday over Easter, we had workmen in to crack on and finish the project, all overseen by my amazing dad. I can’t thank him enough. With dad being our project manager for this kitchen makeover, it meant that we didn’t have to live in the chaos while the work was being done and we got to come home to a kitchen that was very nearly finished.
I nearly cried when I saw how different it was. It was like a completely different room in someone else’s home. But for the purpose of this post, let’s go back in time to how the kitchen looked when we moved in.
BEFORE:
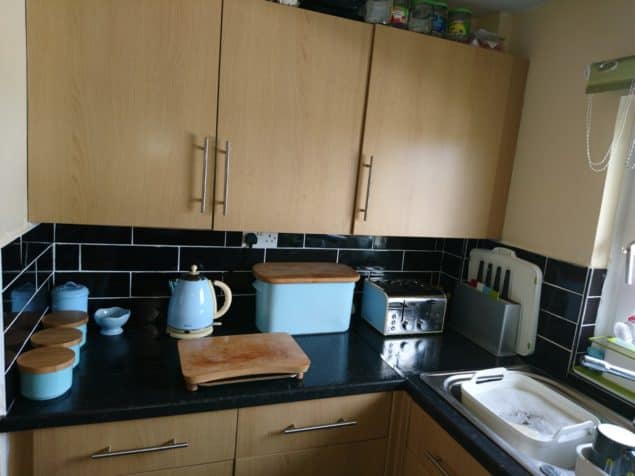
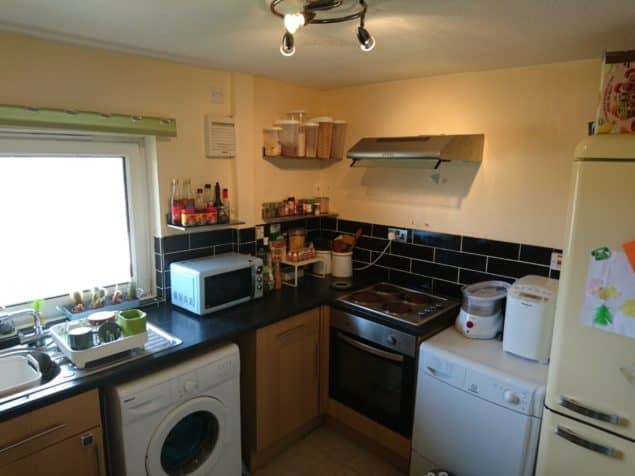
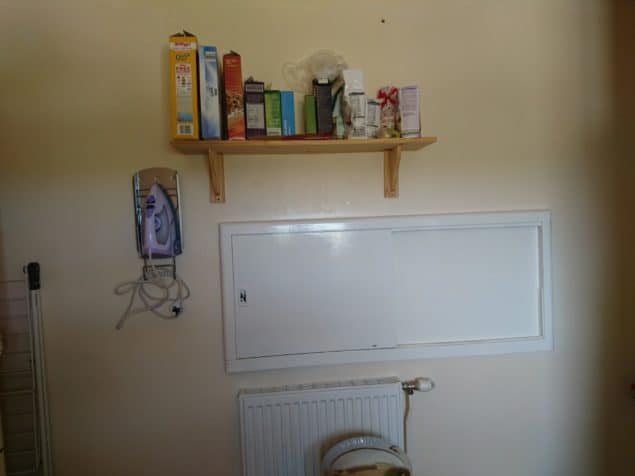
I didn’t have many decent images of my kitchen before as I was too ashamed to actually take any. I mean would you take photos of your kitchen if it looked like this? Plus being so small and dark, it was difficult to get a shot of the whole room.
I absolutely hated the black tiles, they made it look so dark, and what you can’t see is that they were all wonky and the grouting was such a poor job. The guy we bought the flat from fancied himself as a bit of a property developer but everything he did was so appalling in terms of quality. We’ve spent years undoing his poor workmanship.
I also hated the lack of storage. When we first moved in we put up some open shelving as a quick fix but with only one cupboard to store food in, these shelves had to house our cooking ingredients. What a mess! There was just so much clutter. But at least we had a plan of how we could improve things. If you missed that post you could read all about our kitchen makeover plans here.
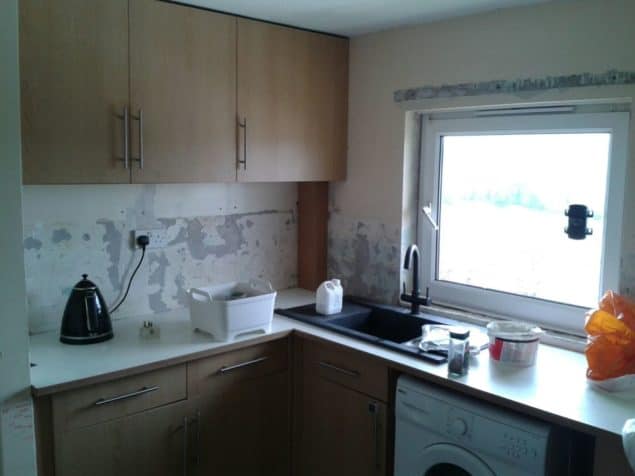 We moved the existing kitchen cabinets right up to the ceiling. It’s definitely made the ceilings feel higher.
Basically, the plan was to move our existing wall cabinets right up to the ceiling (to prevent us storing crap up there and making the kitchen look even more cluttered), add more wall storage and get the tiling done. We’d bought some wall cabinets from IKEA a year ago. We needed something slimline that wouldn’t jut out into the room too much due to where they were being positioned and these IKEA units were just perfect.
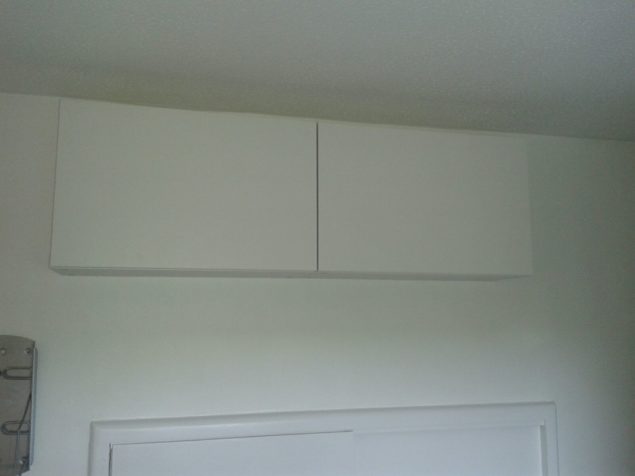
We’ve added this slim IKEA cupboards above the serving hatch to provide extra storage.
(They don’t line up exactly as the door into the kitchen is to the right of this photo and if the cupboards were further right my husband would potentially knock himself out coming into the kitchen)
The tiles we chose were actually the same tiles that we used in our small bathroom makeover. They are from British Ceramic Tile and are part of the Form and Function range. They made such a huge difference to the feeling of light and space in the bathroom so we decided they would be perfect in the kitchen too. We loved the subtle hexagon pattern too and the large format meant fewer grout lines which definitely made the space feel bigger in my opinion.
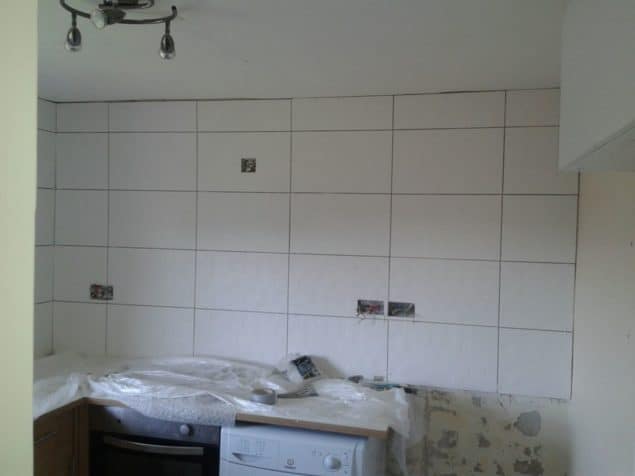
The Form and Function tiles from British Ceramic Tile have really brightened the space and made it feel so much bigger
Whilst we were having the work done, the tradesman who was putting up all our new cabinets and shelving also took down the old extractor above the hob and noticed that the wiring was completely illegal. That meant we also had to get an electrician in to sort that out.
That prompted me to make the snap decision to move a plug socket so we could get a new extractor with a glass splashback. The previous plug socket was right above the hob which was less than ideal, not to mention unsafe. If we ever plugged anything in here the cables would trail across the hob. It was an accident waiting to happen.
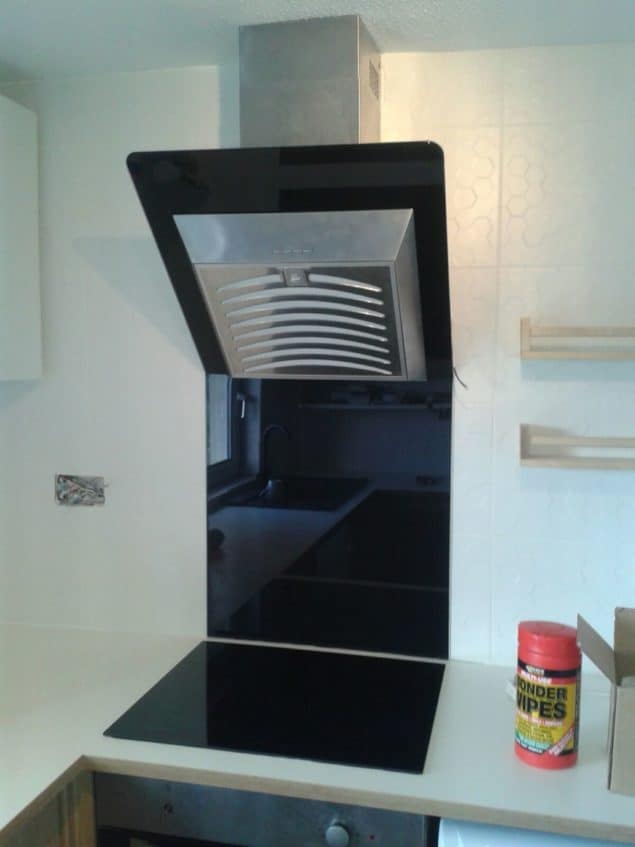
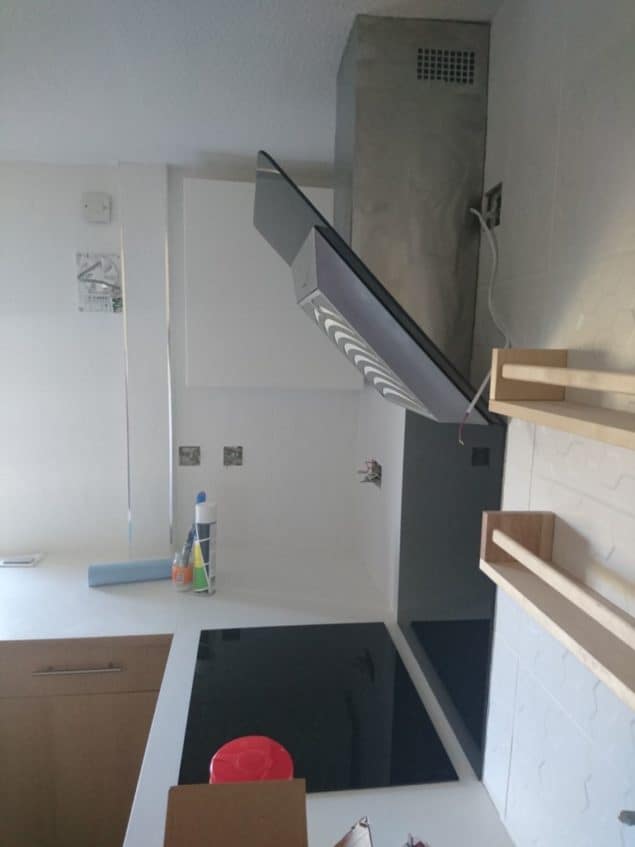
Our new extractor fan with glass splashback is now vented outside
When choosing a new hob extractor (is that the correct term? I don’t know how to distinguish between the one above the hob and the fan in the wall), I wanted something that didn’t project from the wall too far as I didn’t want the space to feel too cramped.
So I went for one that was angled in such a way that the projection was minimized. I’m also so happy I went for one with a glass splashback as it makes it so much easier to clean after we’ve cooked (when I say that I mean my husband…I don’t really cook!). The motor is also really quite powerful so it moves a great deal of air. Our previous extractor simply recirculated the air, but when we had this fitted we made sure it was vented outside.
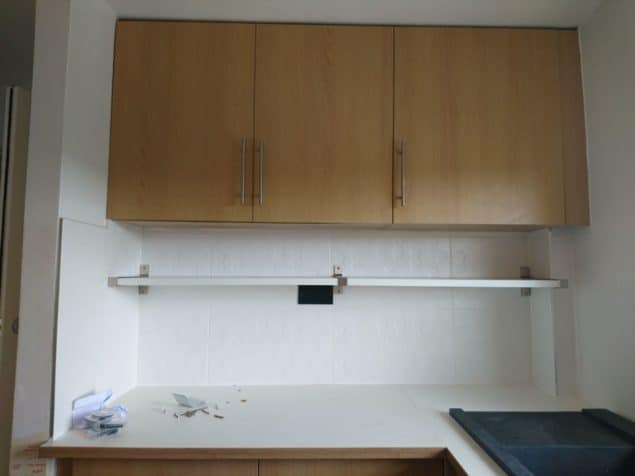
We decided to add a shelf under the cabinets. This would house all the crockery that we use on a daily basis. You can see one of the beautiful matt black sockets in this image too.
I then realised that our beautiful new white tiles would make all our old plug sockets look yellow and yucky. So another unplanned change was to replace all the old sockets. Never being one to go for the cheap option, I decided that matt black sockets would look amazing. So that was an extra £250 that we had not budgeted for. But I’m so glad I went with my instinct as it does look bloody amazing now.
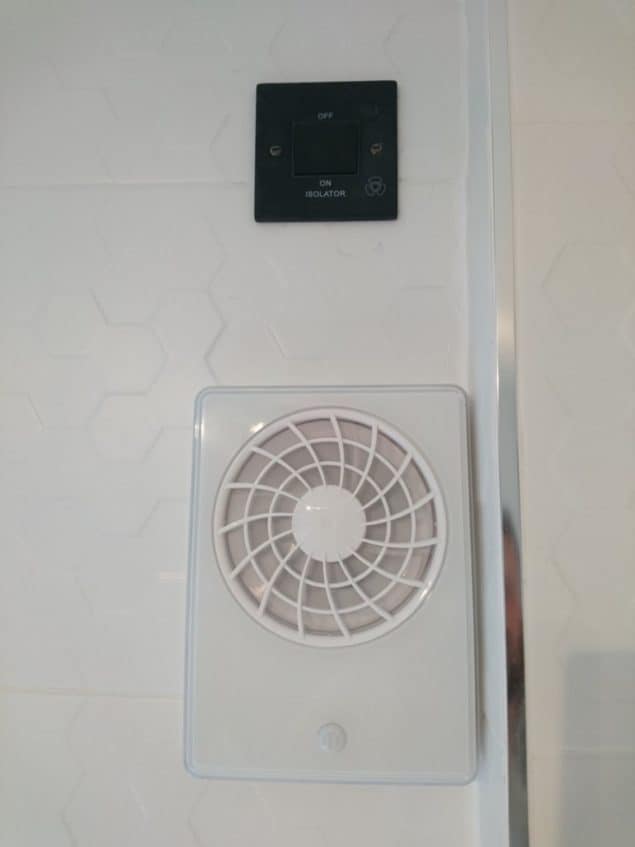
Our fancy pants remote controlled extractor fan and sexy black socket
We also decided to splurge on a new wall extractor fan that was pretty pricey. Both the tradesman and the electrician insisted I could find something cheaper but I was determined not to scrimp here. You see our flat has a slight issue with humidity. All the steam that is created from the kitchen and the bathroom tends to make its way into the girls’ bedroom and can leave us with a minor mould problem. So I was adamant that I wanted the best extraction possible.
We opted for this all singing, all dancing, fancy pants, extractor with remote control (I knew my husband would let me splash out on this as he loves a gadget). What I liked about it though is that it had a humidity sensor and would automatically come on if humidity levels got too high. This is really useful for us as we have a condenser tumble dryer in the kitchen and I often put it on just as I leave for work or if we are going out. I previously had to manually put the wall fan on and it would stay on all day until we came home to turn it off.
With our new sensor, we don’t have to worry about it. It’s also super, super quiet. It has a silent mode which makes it, well silent obviously, but we rarely use that as it is so quiet anyway. In short, it’s amazing! It has lots of other function too but I let my husband have control of the remote!
I am so happy with the changes we have made to our kitchen. There are still things I want to change but we are slowly getting there. I desperately want a new floor, for example, as the tiles we currently have were laid so poorly and are all uneven and some are broken. But the tiler informs me they will be a nightmare to take up and with two small kids running around I can’t face that. We can’t lay vinyl or anything over them as they are not flat. So we are currently considering our options.
I also need to replace the light fixture in the ceiling which was totally bodged and looks like a hot mess! I want to remove the radiator that is below the serving hatch as we never switch it on and without it, we could have some kind of kitchen trolley against the wall which would give us some extra storage and work surface. Oh, I also need a new oven. Ours is getting so unreliable now and it takes an absolute age to actually cook anything.
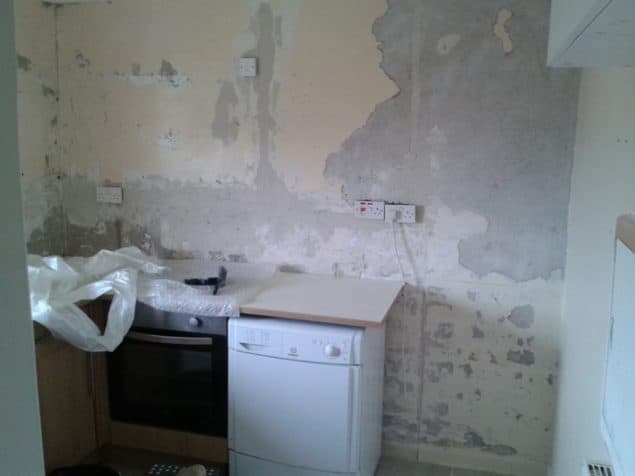
Our worktop previously stopped above the oven. We extended it above the tumble dryer to provide some much needed extra work surface
We’ve been living with our almost finished kitchen for about three weeks now and I can’t tell you what a difference this has made to our lives. It has totally transformed the way that we feel about our home, not just our kitchen. We spend far more time in here and enjoy doing so. I really enjoy keeping it tidy and clean, which I really didn’t before. When your space partially resembles a building site, it really feels like there is no point tidying it as no matter what you do it will still just be a mess.
Now I look forward to cleaning up after dinner and putting everything back in its place. I feel proud of our space and I am no longer embarrassed to invite friends round. I used to hate having to explain why we had no tiles on the wall and why our weekly food shop was scattered all over the kitchen on open shelves.
Anyway, I’ll be posting the final reveal soon so keep your eyes peeled. You’ll soon get to see my sparkly new kitchen in all its glory. I can’t wait to show you. I’ll try to get better images too. (All these were taken by my dad on his phone as we weren’t around.)
Disclosure: This post has been written in collaboration with British Ceramic Tile who have provided the tiles free of charge for our kitchen makeover. However, all the opinions in this post are my own and I stress that I only collaborate with brands and companies that I genuinely like and believe that my readers will like too.

I love how you’ve used larger tiles, makes the space look so much bigger! x
How exciting, glad you have finally been able to work on your kitchen! I love the black sockets and the gorgeous tiles.
I love it! And I am thinking about a change too. Last year we did an improvement, changing the window. Actually moving it a bit higher then the faucet. So the window opens now!
This brings back memories of my old kitchen! We found the floor tiles so badly laid that they weren’t even stuck down properly, so were so easy to remove!!
It’s already looking so much brighter and lighter in there!! Can’t wait to see the whole thing done ;) xx
So pleased you’ve made such good progress in this room. It’s looking great Stacey!!